Bizz Wizz : Setup , Main Menu , Ledger , Phone Book , Invoice Book , Stock Book , Order Book , Creditors , Point of Sale , Business Name , Diary , Wages , Document Manager , Unlock , Backup, Memo
NOTE: By moving the mouse over the buttons, the help box at the bottom of that screen will give you a brief description of the function of that button.
Document are saved for each Contact or Part or sub-Group or
Invoice or Order Depending on Where you are in the software.
The First Button is the Customers Documents button, the name on this button will
change depending on where the doc manger is loaded from. The rest of the
buttons are for your template documents (My Letters), (My Templates).....
Your templates can be copied and edited then saved into the customers documents
as a new document by using (load
as new copy).

Documents- There are
six buttons + exit on the Document Manager page. They are:
[Add Document] - Click
here to go to the [Open Dialogue] popup. You can select the file you wish to
save as a document.
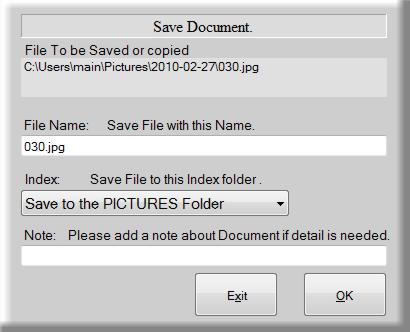
When you select the file and click the open button, a small box shown
directly below will open asking you if you wish to change the file name.
The second drop down combo allows you to save the document to the document
manager folder of your choice. Pick the correct folder, then in the next text
input box you can give the document a note about the document in 50 characters. If yes, enter the note and then click
on the [OK] button.
The document will be saved to the Document Manager.
You can also Drag and Drop a file into the Document manger to add it.

[Load as New Copy]- This button allows you to duplicate a document eg.(
if you have a template of a form which you would like to fill out for a client.
Use this function to copy the form to their folder before you edit.)
Highlight the document you wish to copy and click the Load as New Copy
button. A small box shown directly above will open asking you if you
wish to change the file name. The second drop down combo allows you to
save the document to the document manager folder of your choice. Pick the
correct folder, then in the next text input box you can give the document a note
about the document in 50 characters. If yes, enter the note and then click
on the [OK] button.
The document will be saved to the Document Manager.
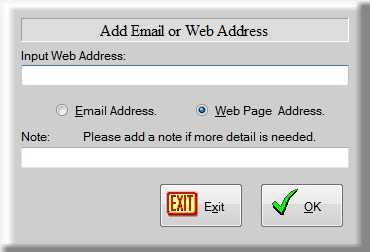
[Add Web]- Click to open the [Add Email or
Web Address] page. You can only enter either an Email Address or Web Address.
Enter the address in the [Input Web Address] field and then click on either
the [Email Address] or [Web Page Address] circles.
There is also a [Note] field if you need to add more detail.

Change Note Button Clicking on this button will allow you to change the note in the document file you have selected.
[Delete]- When you click on Delete a pop up
box will ask [Do you wish to delete this Document]. You have two options.
Click on [Yes] to delete the Document and the link, or click on [No] to delete
the link only. If you change your mind, and don't want to delete the Document,
then click on [Cancel].
[Load Document]- When you click on Load Document, the Document that is highlighted in the Document Manager will open for your perusal.
Exit Button The exit button will exit the document
manager and return. The
Document button in the application you launched the document manager from will be highlighted
in Blue showing that there is a
Document in the Document manager.