BIZZ WIZZ PHONE BOOK
This Page : MAIN SCREEN , ADDRESS LETTERS , EXPORT CONTACTS
Bizz Wizz : Setup , Main Menu , Ledger , Phone Book , Invoice Book , Stock Book , Order Book , Creditors , Point of Sale , Business Name , Diary , Wages , Document Manager , Unlock , Backup, Memo
See Also : Phone Book , Add Contacts , Print Stickers , Import Contacts
NOTE: By moving the mouse over the buttons, the help box at the bottom of that screen will give you a brief description of the function of that button.
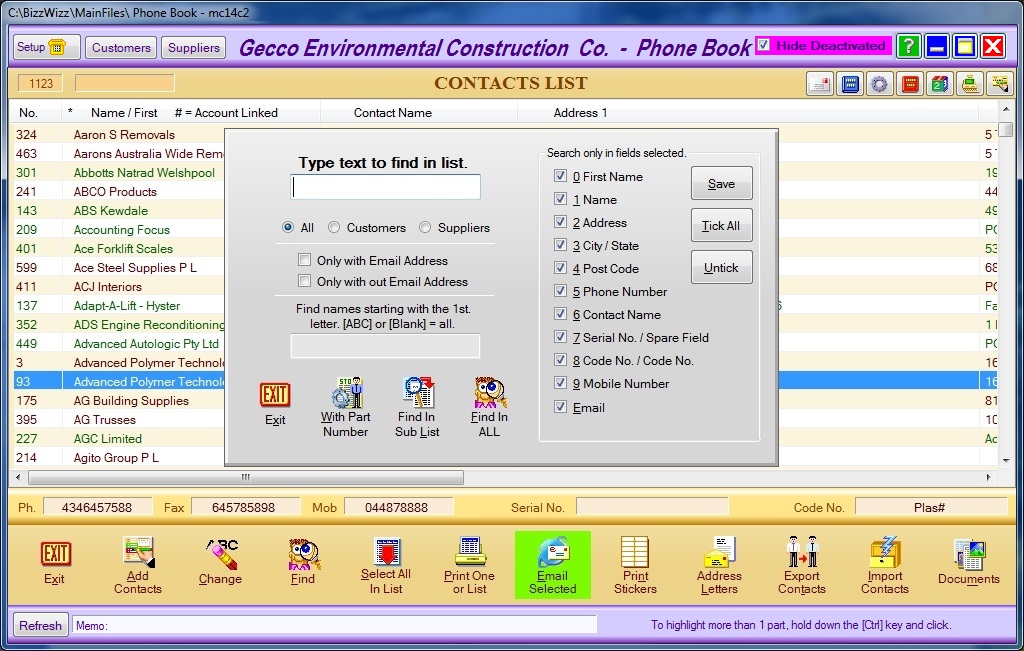
At the top of the window
Then a box showing what has been typed to Auto Find in list.
Then the last selected History Buttons {Customers}&{Suppliers} when
clicked a drop down list will be seen clicking on one of the names will take you
to that name in the full list.
To the Right is the Hide Deactivated this will stop deactivated accounts
from showing in the list
At the top of the list is the number of accounts in the list.
Click to top of the column to sort by that column. Columns
can also be moved left or right by dragging the top of the column.
Add Contact- If you need to enter a contact go to Add
Contact
Change- First highlight the Contact and then click on
this button to make any changes needed to the Contact record. This will allow
you to make changes to the Contact's Account record. Make sure you
click on the [OK Save] button after making changes to the record.
Note about Deleting - You can not delete from the Phone Book only form
Invoicing and Creditors.
Find- Click to find a Transaction. There are ten fields that you can click on
to find data in. If you want to find the Contact by
Name, click only on Name and then enter that Name in the text field. If you want
to find the Contact by Phone Number, click only on Phone Number and then enter
that Phone Number in the text field.
If you want to find all Contacts with
Business Names starting with A, then enter A in [Find names starting with the
first letter. [ABC] or [Blank]= all].
There is a [Save] button that you can
click on that will save the selected field options.
When you go back into the [Find] option only the saved fields will be ticked for you
to locate Contact information.
The [List Find] button will search the current
list,
while the [All Find] button will search all the data.
Select All In List - This button highlights all names in the list.
Print One or List- You can print one contact or a list of contact just
select when asked. A Print Menu pop up box will open. If
you already have your printer set up click on [Print] to send the Supplier
details straight to the printer. [Print Condensed] will condense the Contact's
information to be printed. If you need to choose a printer then click on
[Print To] which will bring up your printer options. Choose the printer you
would like to send the Contact's details to and click on OK. If you
click on [Export] the [Select Format] page will open. You can choose from PDF
ADOBE, HTML, WORD, JPEG or EXCEL. Click on your chosen option and follow the
prompts.
Email Selected - Click button to open the page to send an
Email to the selected contacts. If the Email button is highlighted Green, then the
contact does have an Email Address. If more than one contact is
highlighted the same email will be sent to all.
Print Stickers - Click this button to Show the
Address Sticker Print Manager Wizard.
Import Contacts - Lets you import names and address detail from other
software. Imports contacts in '
CSV and TXT ' files
Documents- Click on the [Documents] button to open the
Documents Manager page. There are four buttons on the
Document Manager page that are Add/Show a Document, Email Address, Web
Address and the Delete button.
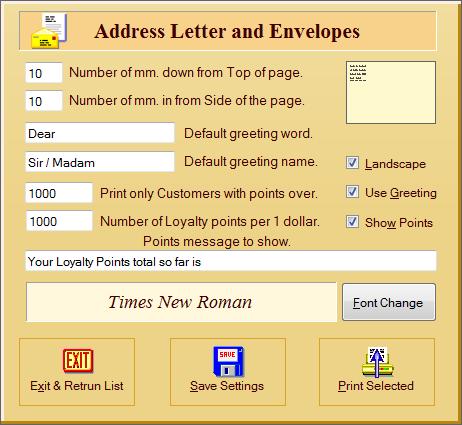
The Address letter Popup lets you setup how to print on to a
letter.
The first two boxes positions the text on the page. You will also need to
check the Landscape tick box
The next two boxes let you set up a greeting line under the address when printed
. You will also need to check the Use Greeting tick box to turn on
this function.
The next three boxes set up printing of Loyalty points on the letter . You will
also need to check the Show Points tick box to turn on this
function.
Set the value in the boxes printing
You can also change the Font by clicking on the Font Change Button
To save your setups click the Save Settings button
Click Print Selected to print all contacts selected.
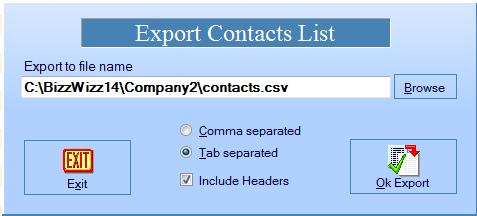
To Export Contacts to enter the file name to export too, Then
select if the file will be comma or tab separated (delimited) and if headers are
needed.
File types can have a TXT or CSV extensions
See Also : Phone Book , Add Contacts , Print Stickers , Import Contacts